AI Agent
Environments
UV
How to install
- definition : module for managing project ! (better than pip, pyenv, poetry, virtualenv …)
- How to install
How to use
- Initialize a project
cd {directory}

// Create a folder named prj_name, and init uv under the folder
uv init {prj_name}

// init uv at current folder
uv init
- Fetch and setup other project dependencies
// Copy pyproject.toml file into your project folder
// And then,
uv sync # at the folder
- Add new package without pyproject.toml
uv add {package_name}
uv.lock File
- After setting up dependencies with
addorsync, There might be a a file named uv.lock. And the file is designed to let system know the sub-dependencies of the main dependencies which are specidifed under pyproject.toml
Jupyter
How to install
- Install jupyter extension in vscode
-
Install ipykernel python module using
uv// --dev argumnet is to install the module only for developer uv add ipykernel --dev
How to use
- Create
.ipynbfile with main or with other name. - Select
venvwhich is created by uv
OpenAI Billing
- OpenAI billing page
- $30-$50 might be enough to move forward
Set up project
- Create folder
-
Initialize uv
uv init - Copy
pyproject.tomlif it is provided. -
Synchronize current project’s dependencies with dipendencies which are specified pyproject.toml
uv sync // if not in Onedrive uv sync --python 3.12 // crewai and other package have dependencies on python 3.12 // If you're using OneDrive of Windows // 1. Not use hardlink uv sync --link-mode=copy # do not use hardlink // 2. Clean cache and do sync uv cache clean uv sync - Set vscode’s venv to uv’s venv
-
Create
.env fileand add OPENAI_API_KEY (you can use any other name as env variable)os.getenv("OPENAI_API_KEY") # it will return the key -
Run a python code
 uv run {python_code}.py
 uv run --python 3.12 {python_code}.py
Build your first AI response
-
How to get response from
the selected modelby usingopenai module
# Create client to link to openai
import openai
client = openai.OpenAI()

# Arguments
# - model : go to prcing page, and then choose one of the models
# - messages : a list of dict need to be fed into this argument
response = client.chat.completions.create(
    model="gpt-4o-mini",
    messages=[
        {
            "role" : "user",
            "content" : "How to build usd asset assembly in houdini ?",
        }
    ]
)

# Following that, just retrieve message from choice object
choice = response.choices[0]
choice.message.content
AI Agent ! what is that ?
- Definition : A system that handle with question or problem on behalf of user
-
And, AI Agent is an AI, when user asks
""" I have the following functions in my system. `get_weather` `get_currency` `get_news` All of them receive the name of a country as an argument (i.e get_news('spain')) Please answer with the name of the function that you would like me to run. Please say nothing else, just the name of the function with the arguments. Answer the following question: What is the weather in Greece ? """ - not ask
""" How to get a weather in Greece by using functions below ? `get_weather` `get_currency` `get_news` """ - if so, it returns

- instead of
"To get the weather in Greece using a hypothetical `get_weather` function, you would typically follow these steps:\n\n1. **Check Parameters Required**: Understand what parameters the `get_weather` function accepts. Common parameters might include the location (in this case, Greece), the date for which you want the weather, and perhaps the type of data you need (current weather, forecast, etc.).\n\n2. **Call the Function**: Use the `get_weather` function with the appropriate arguments.\n\nHere’s a simple example in Python (assuming these functions are provided in a package or module):\n\n```python\n# Example of fetching weather in Greece\n\n# Assume these functions are defined in a module named 'weather_api'\nfrom weather_api import get_weather\n\n# Get current weather in Greece\ngreece_weather = get_weather(location='Greece')\n\n# Output the weather\nprint(greece_weather)\n```\n\n### Example Output\nThe output might be a dictionary or an object with weather details such as temperature, humidity, condition (sunny, rainy, etc.).\n\n### Additional Options\nIf you want to retrieve related information, you could also use the `get_currency` and `get_news` functions in a similar manner:\n\n```python\n# Example of fetching currency and news related to Greece\n\n# Get the currency information\nfrom finance_api import get_currency\n\ngreece_currency = get_currency(country='Greece')\nprint(greece_currency)\n\n# Get news related to Greece\nfrom news_api import get_news\n\ngreece_news = get_news(topic='Greece')\nprint(greece_news)\n```\n\n### Summary\n- Use `get_weather` to fetch weather data for Greece.\n- Use `get_currency` to fetch currency details (like the Euro).\n- Use `get_news` to get the latest news related to Greece.\n\nBe sure to check the documentation for the specific API or library you're using to understand the exact function signatures and available parameters!"
Promptis really important !
Adding memory
- Goal : How to make the Ai
rememberprevious answers - Problem ! : With the code above - Build your first AI response, it will not remember user’s previous question like
user : My name is Taiyeong AI : Hi Taiyeong, what can I help you? user : what is my name AI : Sorry... -
Solution : Append user input (str) and AI reponse (str or object) to
listor other type of variablemsg_stack = [] # Ask question to ai msg_stack.append({"role":"user", "content":user_msg}) response = client.chat.completions.create(model="gpt-4o-mini", messages=msg_stack) # After that, append the answer to the message stack answer = response.choices[0].message.content msg_stack.append({"role":"assistant", "content":answer}) # Get another question msg_stack.append({"role":"user", "content":user_msg})- Fianl code
  from typing import List
  import openai
  client = openai.OpenAI()

  def call_ai(msg_stack :List[dict]) -> str:
      response = client.chat.completions.create(
          model="gpt-4o-mini",
          messages=msg_stack
      )
      answer = "Sorry, I didn't get it. Can you explan more detail ? "
      if response:
          answer = response.choices[0].message.content
      msg_stack.append(
              {"role":"assistant", "content":answer}
          )
      return answer


  msg_stack = []
  while True:
      user_msg = input("Send a message to the LLM...")
      if user_msg == "quit" or user_msg == "q":
          print(f"Ai Answer : Ok, I will close this conversation now, but if you need any help, feel free to reach out to me :)")
          break
      else:
          msg_stack.append(
              {"role":"user", "content":user_msg}
          )
          answer_from_ai = call_ai(msg_stack)
          print(f"User ask : {user_msg}")
          print(f"Ai Answer : {answer_from_ai}")
Adding Tools
- Goal : Make the Ai give purpose-oriented answer in terms of coding
- not text-based answer but
answer based on api documents
- not text-based answer but
- How to ? - tools=TOOLS / “role”: “tool” / “tool_call_id”: tool_call.id / “tool_calls” …
- Give tool schema to the ai
- Check if
response.choice[0].message.contentis None or not - it means the answer used tools and tools mapping - Check
response.choice[0].message.tool_calls. And then, give feedbacks to the ai- Append feedback two times
- functions and arguments that ai gave us
- returns that functions returned after running the functions
- Register functions - Check
FUNCTION_MAPvariable below
- Register functions - Check
- Append feedback two times
from openai.types.chat import ChatCompletionMessage


def get_weather(city):
    return "33 degrees celcius."


FUNCTION_MAP = {
    "get_weather": get_weather,
}


def process_ai_response(message: ChatCompletionMessage):

    if message.tool_calls:
        messages.append(
            {
                "role": "assistant",
                "content": message.content or "",
                "tool_calls": [
                    {
                        "id": tool_call.id,
                        "type": "function",
                        "function": {
                            "name": tool_call.function.name,
                            "arguments": tool_call.function.arguments,
                        },
                    }
                    for tool_call in message.tool_calls
                ],
            }
        )

        for tool_call in message.tool_calls:
            function_name = tool_call.function.name
            arguments = tool_call.function.arguments

            print(f"Calling function: {function_name} with {arguments}")

            try:
                arguments = json.loads(arguments)
            except json.JSONDecodeError:
                arguments = {}

            function_to_run = FUNCTION_MAP.get(function_name)

            result = function_to_run(**arguments)

            print(f"Ran {function_name} with args {arguments} for a result of {result}")

            messages.append(
                {
                    "role": "tool",
                    "tool_call_id": tool_call.id,
                    "name": function_name,
                    "content": result,
                }
            )

        call_ai()
    else:
        messages.append({"role": "assistant", "content": message.content})
        print(f"AI: {message.content}")


def call_ai():
    response = client.chat.completions.create(
        model="gpt-4o-mini",
        messages=messages,
        tools=TOOLS,
    )
    process_ai_response(response.choices[0].message)
CrewAI
Terminolgoy
- crew : a group of agents
- agent : it is a thing that help user get answer based on purpose of question
- task : task is task
Basic workflow of CrewAI
- Use decorators : CrewBase / agent / task / crew
- There are three parts - main.py / tools.py / agents.yaml and tasks.yaml
- The CrewBase decorator collects agents and tasks automatically
Main.py
-
This main code feed yaml files and tools.py
  import dotenv

  dotenv.load_dotenv()

  from crewai import Crew, Agent, Task
  from crewai.project import CrewBase, agent, task, crew
  from tools import count_letters


  @CrewBase
  class TranslatorCrew:

      @agent
      def translator_agent(self):
          return Agent(
              config=self.agents_config["translator_agent"],
          )

      # This agent is using `tools`
      @agent
      def counter_agent(self):
          return Agent(
              config=self.agents_config["counter_agent"],
              tools=[count_letters],
          )

      @task
      def translate_task(self):
          return Task(
              config=self.tasks_config["translate_task"],
          )

      @task
      def retranslate_task(self):
          return Task(
              config=self.tasks_config["retranslate_task"],
          )

      @task
      def count_task(self):
          return Task(
              config=self.tasks_config["count_task"],
          )

      @crew
      def assemble_crew(self):
          return Crew(
              agents=self.agents,
              tasks=self.tasks,
              verbose=True,
          )


  TranslatorCrew().assemble_crew().kickoff(
      inputs={
          "sentence": "I'm Nico and I like to ride my bicicle in Napoli",
      }
  )
yaml files : how crewai use yaml files which are under config folder
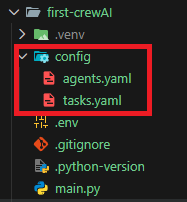
- The folder name for these yaml file must be
config - agents.yaml
translator_agent: role: > Translator to translate from English to Italian goal: > To be a good and useful translator to avoid misunderstandings. backstory: > You grew up between New York and Palermo, you can speak two languages fluently, and you can detect the cultural differences. counter_agent: role: > To count the lenght of things. goal: > To be a good counter that never lies or makes things up. backstory: > You are a genius counter. - tasks.yaml
      translate_task:
          description: >
              Translate {sentence} from English to Italian without making mistakes.
          expected_output: >
              A well formatted translation from English to Italian using proper capitalization of names and places.
          agent: translator_agent

      retranslate_task:
          description: >
              Translate {sentence} from Italian to Greek without making mistakes.
          expected_output: >
              A well formatted translation from Italian to Greek using proper capitalization of names and places.
          agent: translator_agent

      count_task:
          description: >
              Count the amount of letters in a sentence.
          expected_output: >
              The number of letters in a sentence.
          agent: counter_agent
tools.py : how crewai use tools
- Crewai has its own tools
- How to use user-defined-tools
-
Create a function and add
tooldecorator for the functionfrom crewai.tools import tool @tool def count_letters(sentence: str): """ This function is to count the amount of letters in a sentence. The input is a `sentence` string. The output is a number. """ print("tool called with input:", sentence) return len(sentence) -
yaml files . Add specific
instructionintoagents.yamlandtasks.yaml-
agents.yaml
counter_agent: role: > To count the lenght of things. goal: > To be a good counter that never lies or makes things up. backstory: > You are a genius counter. -
tasks.yaml
  count_task:
      description: >
          Count the amount of letters in a sentence.
      expected_output: >
          The number of letters in a sentence.
      agent: counter_agent
-
-
Decorated functions . Create
an agent functionanda task functionfrom tools import count_letters @CrewBase class TranslatorCrew: # ... @agent def counter_agent(self): return Agent( config=self.agents_config["counter_agent"], tools=[count_letters], ) @task def count_task(self): return Task( config=self.tasks_config["count_task"], ) # ...
-

CrewAI 01: News Reader Agent
Properties of two yaml files
Date / LLM / Markdown / Output file / Create Directory
- Within the title, I’d write down …
- agetns.yaml
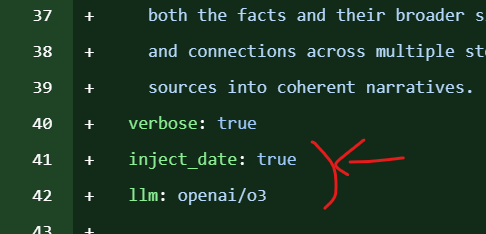
inject_dateproperty : boolllmproperty : str
- tasks.yaml
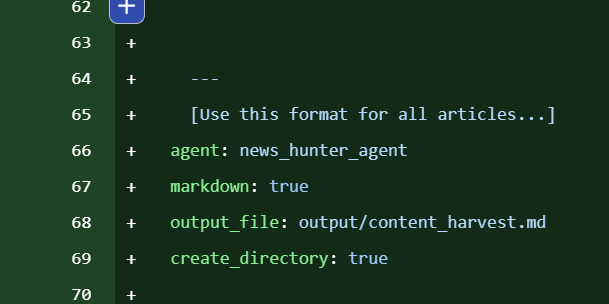
markdownproperty : booloutput_filepropertycreate_directoryproperty
- agetns.yaml
SerperDevTool / playwright - sync_playwright / BeautifulSoup
- By using those modules,
Create toolswith tool decorator - And, use the tools in main.py for an agent method
SuperDevTool
- Url : Serper
- Need to create an
acount - Need to create and save an
API key - Save the API key in
.env file
- Need to create an
- Definition
- A tool for searching something from Goolge, created by CrewAI
-
Example
  from crewai_tools import SerperDevTool

  tool = SerperDevTool()

  result = tool.run(search_query="ChatGPT")
  print(result)
Playwright
- Definition
- Created by Microsoft
- Opensource browser automating library
- Allow user to control Chrominum.Firefox.WebKit
- Use for web-testing, web-scrapping, UI-automation …
Sync vs Async, provided by Playwright
-
Playwright는 두 가지 API 스타일을 제공해요:
API 스타일 모듈 특징 동기(Sync) playwright.sync_api일반적인 Python 코드처럼 순차적으로 실행됨 비동기(Async) playwright.async_apiasync/await기반, 고성능 병렬 작업 가능- 동기 API는 직관적이고 디버깅이 쉬워서 빠르게 작업하기 좋아요.
-
🎭
playwright.sync_api와sync_playwright란?-
playwright.sync_api는 Playwright의 동기(Synchronous) API 버전을 제공하는 모듈이에요.sync_playwright는 Playwright를 동기 방식으로 실행하기 위한 엔트리 포인트 함수입니다. -
🚀 기본 사용 예시
from playwright.sync_api import sync_playwright with sync_playwright() as p: browser = p.chromium.launch() page = browser.new_page() page.goto("https://playwright.dev") print(page.title()) browser.close()- Playwright 실행
- Chromium 브라우저 실행
- 새 페이지 열기
- 특정 URL로 이동
- 페이지 제목 출력
- 브라우저 종료
-
-
playwright.async_api-
Large-scale crawling
  import asyncio
  import aiohttp
  from bs4 import BeautifulSoup

  class Crawler:
      def __init__(self, max_workers=20, max_concurrency=5):
          self.queue = asyncio.Queue()
          self.semaphore = asyncio.Semaphore(max_concurrency)
          self.max_workers = max_workers

      async def fetch(self, session, url):
          async with self.semaphore:
              async with session.get(url) as resp:
                  return await resp.text()

      async def worker(self, session):
          while True:
              try:
                  url = await asyncio.wait_for(self.queue.get(), timeout=3)
              except asyncio.TimeoutError:
                  return

              html = await self.fetch(session, url)
              await self.parse(html)
              self.queue.task_done()

      async def parse(self, html):
          soup = BeautifulSoup(html, "html.parser")
          # 데이터 추출 및 저장 로직
          pass

      async def run(self, start_urls):
          async with aiohttp.ClientSession() as session:
              for url in start_urls:
                  await self.queue.put(url)

              workers = [
                  asyncio.create_task(self.worker(session))
                  for _ in range(self.max_workers)
              ]

              await self.queue.join()

              for w in workers:
                  w.cancel()

  asyncio.run(Crawler().run(["https://example.com"]))
-
CrewAI 02: Job hunter agent
Git
Agents and Tasks
- When to use: Use when defining the core logic of your AI application. Separating configuration (YAML) from execution logic (Python) allows for easier prompting updates without touching the codebase.
- Key Concept: The
agentproperty intasks.yamlexplicitly links a specific task to the agent responsible for executing it.
How to use
- Explanation:
- Define agent personas in
agents.yaml(role, goal, backstory). - Define task instructions in
tasks.yaml, ensuring theagentkey matches the agent’s name. - Use the
@crew,@agent, and@taskdecorators inmain.pyto map these configurations to Python methods.
- Define agent personas in
-
Code block:
  # config/agents.yaml
  job_search_agent:
  role: >
      Senior Job Market Research Specialist
  goal: >
      Discover and analyze relevant job opportunities...
  # ... (backstory omitted)
# config/tasks.yaml job_extraction_task: description: > Find and extract {level} level {position} jobs in {location}. # ... expected_output: > A JSON object matching the `JobList` schema. agent: job_search_agent # <--- Links task to specific agent# main.py @agent def job_search_agent(self): return Agent( config=self.agents_config["job_search_agent"], tools=[web_search_tool], ) @task def job_extraction_task(self): return Task( config=self.tasks_config["job_extraction_task"], output_pydantic=JobList, ) -
Code block (Recommended Practice) (Use
CrewBaseclass structure to automatically load YAML configs)from crewai.project import CrewBase, agent, task, crew @CrewBase class JobHunterCrew: """JobHunterCrew crew""" agents_config = 'config/agents.yaml' tasks_config = 'config/tasks.yaml' # The decorators automatically match the function name # to the key in the YAML file.
Structured Outputs
- When to use: Use when you need the AI to return data in a reliable, machine-readable format (JSON/Object) instead of plain text. This is critical for downstream processing or API integrations.
- Key Concept: The
output_pydanticargument enforces a strict schema defined by aBaseModel.
How to use
- Explanation:
- Define a class inheriting from
pydantic.BaseModelinmodels.py. - Import this model in your
main.py. - Pass the class to the
output_pydanticparameter in the@taskdefinition.
- Define a class inheriting from
-
Code block:
  # models.py
  from pydantic import BaseModel
  from typing import List

  class Job(BaseModel):
      job_title: str
      company_name: str
      job_location: str
      # ...

  class JobList(BaseModel):
      jobs: List[Job]
# main.py from models import JobList @task def job_extraction_task(self): return Task( config=self.tasks_config["job_extraction_task"], output_pydantic=JobList, # <--- Enforces structure ) -
Code block (Recommended Practice) (Add descriptions to Pydantic fields to improve LLM accuracy)
  from pydantic import BaseModel, Field

  class Job(BaseModel):
      job_title: str = Field(..., description="The official title of the position")
      is_remote_friendly: bool = Field(..., description="True if remote work is explicitly allowed")
Context
- When to use: Use when a task requires the specific output of a previous task to function correctly. This establishes a dependency chain.
- Key Concept: The
contextargument acts as a pipe, feeding the results of prior tasks directly into the prompt of the current task.
How to use
- Explanation:
- Identify the task that produces the data (e.g.,
job_selection_task). - Identify the receiver task (e.g.,
resume_rewriting_task). - In
main.py, pass the producer task method call into thecontextlist of the receiver task. - In
tasks.yaml, reference the input data clearly (e.g., “Given the selected job…”).
- Identify the task that produces the data (e.g.,
-
Code block
  # main.py
  @task
  def resume_rewriting_task(self):
      return Task(
          config=self.tasks_config["resume_rewriting_task"],
          context=[
              self.job_selection_task(), # <--- Feeds output from job_selection_task
          ],
      )
# config/tasks.yaml resume_rewriting_task: description: > Given the user's real resume... and the selected job (ChosenJob), your task is to rewrite the existing resume... # ... -
Code block (Recommended Practice) (Explicitly type-hint the context in the agent prompt for clarity)
  # config/tasks.yaml
  resume_rewriting_task:
  description: >
      INPUT DATA:
      - Selected Job Details: {job_selection_task_output}

      TASK:
      Rewrite the resume to align with the Selected Job Details above.
Firecrawl Tool
- When to use: Use specifically for extracting clean content from websites, bypassing common bot protections. It is optimized for LLM ingestion by returning Markdown.
- Key Concept: The
FirecrawlApphandles the connection, andScrapeOptionsformats the output.
How to use
- Explanation:
- Obtain an API key from firecrawl.dev.
- Instantiate
FirecrawlAppwith the key. - Use the
.search()method to query the web. - Use
ScrapeOptions(formats=["markdown"])to ensure the text is AI-readable. - Clean the output (regex) to remove noise like excessive newlines or unrelated links.
-
Code block:
# tools.py from firecrawl import FirecrawlApp, ScrapeOptions import os, re @tool def web_search_tool(query: str): app = FirecrawlApp(api_key=os.getenv("FIRECRAWL_API_KEY")) response = app.search( query=query, limit=5, scrape_options=ScrapeOptions( formats=["markdown"], ), ) # ... (Cleaning logic follows) -
Code block (Recommended Practice) (Use
.scrape()directly if you already have the specific URL from a previous search, rather than searching again)@tool def specific_page_scraper(url: str): app = FirecrawlApp(api_key=os.getenv("FIRECRAWL_API_KEY")) response = app.scrape( url=url, scrape_options=ScrapeOptions(formats=["markdown"]) ) return response['markdown']
Knowledge Sources
- When to use: Use when agents need access to static, domain-specific data (like a resume, policy document, or codebase) that exceeds the standard prompt context window or requires retrieval.
- Key Concept: Sources can be raw strings or files. The
TextFileKnowledgeSourceis used for reading local files.
How to use
- Explanation:
- Import
TextFileKnowledgeSource. - Initialize it with the path to your file(s).
- Pass this source object to the
knowledge_sourceslist in theAgentdefinition.
- Import
-
Code block:
# main.py from crewai.knowledge.source.text_file_knowledge_source import TextFileKnowledgeSource # Define source resume_knowledge = TextFileKnowledgeSource( file_paths=[ "resume.txt", ] ) @agent def job_matching_agent(self): return Agent( config=self.agents_config["job_matching_agent"], knowledge_sources=[resume_knowledge], # <--- Agent gets access here ) -
Code block (Recommended Practice) (Using StringKnowledgeSource for dynamic data passed at runtime)
  from crewai.knowledge.source.string_knowledge_source import StringKnowledgeSource

  def create_dynamic_knowledge(user_input_text):
      return StringKnowledgeSource(
          content=user_input_text,
          metadata={"source": "user_input"}
      )
Results of task in a form of pydantic
- When to use: Use to programmatically access the structured data returned by the agents after the crew finishes execution. This allows you to inspect, validate, or save the specific object rather than a raw string.
- Key Concept: The
kickoff()method returns a result object containingtasks_output. Each output has a.pydanticproperty if the task was configured withoutput_pydantic.
How to use
- Explanation:
- Execute the crew using
.kickoff(). - Iterate through
result.tasks_output. - Access the
.pydanticattribute to get the instantiated Pydantic object (e.g.,JobList,ChosenJob).
- Execute the crew using
-
Code block:
# main.py result = ( JobHunterCrew() .crew() .kickoff( inputs={ "level": "Senior", "position": "Golang Developer", "location": "Netherlands", } ) ) # Debugging / Accessing the object for task_output in result.tasks_output: print(task_output.pydantic) -
Code block (Recommended Practice) (Type checking the output before using it)
  from models import ChosenJob

  for task_output in result.tasks_output:
      if isinstance(task_output.pydantic, ChosenJob):
          print(f"Selected Job: {task_output.pydantic.job.job_title}")
          # Save to database or pass to next system
CrewAI 03-1 : Content Pipeline Agent
Flow
- Definition or When to use: 비선형(Non-linear) 워크플로우를 설계할 때 사용합니다. 단순한 순차 실행을 넘어, 여러 Crew(Agent와 Task의 집합)를 유기적으로 연결하고 상태를 관리하는 컨테이너 역할을 합니다.
How to use
- Explanation:
Flow클래스를 상속받아 정의합니다.- 제네릭 타입으로 상태(State) 클래스를 지정하여 타입 안정성을 확보할 수 있습니다.
-
내부에 에이전트, 태스크, 라우팅 로직을 포함하여 복잡한 작업을 구조화합니다.
-
Code block:
# Source Code from Lecture from crewai.flow.flow import Flow, listen, start, router, and_, or_ from pydantic import BaseModel class MyFirstFlowState(BaseModel): user_id: int = 1 is_admin: bool = False class MyFirstFlow(Flow[MyFirstFlowState]): # ... 메서드 정의 ... pass flow = MyFirstFlow() flow.kickoff() -
Code block(Recommended Practice) (복잡한 로직의 경우, Flow를 별도 파일로 분리하고 실행 결과를 명시적으로 받아 처리하는 방식을 권장합니다.)
  # Recommended Practice
  if __name__ == "__main__":
      flow = MyFirstFlow()
      result = flow.kickoff()
      print(f"Flow Execution Result: {result}")
listen
- Definition or When to use: 특정 작업(메서드)이 완료되거나 특정 신호(반환 값)가 발생했을 때 후속 작업을 트리거하는 데코레이터입니다.
How to use
- Explanation:
- 메서드 자체를 인자로 받으면 해당 메서드 완료 후 실행됩니다.
-
문자열(String)을 인자로 받으면,
router등에서 반환된 값과 일치할 때 실행됩니다. -
Code block:
# Source Code from Lecture @listen(first) def second(self): self.state.user_id = 2 print("world") @listen("even") def handle_even(self): print("even") -
Code block(Recommended Practice) (문자열 하드코딩 대신 Enum을 사용하여 오타를 방지하고 유지보수성을 높이는 것을 권장합니다.)
  # Recommended Practice
  from enum import Enum

  class FlowStatus(Enum):
      EVEN = "even"
      ODD = "odd"

  # ... router에서 FlowStatus.EVEN.value 반환 ...

  @listen(FlowStatus.EVEN.value)
  def handle_even(self):
      # 로직 수행
      pass
or_ / and_
- Definition or When to use: 여러 작업의 흐름을 제어할 때 사용합니다.
and_는 모든 선행 작업 완료 시,or_는 하나라도 완료 시 후속 작업을 수행합니다.
How to use
- Explanation:
-
@listen데코레이터 내부에서 두 개 이상의 메서드를 논리 연산자로 묶어 사용합니다. -
Code block:
# Source Code from Lecture @listen(and_(second, third)) def final(self): print(":)") -
Code block(Recommended Practice) (가독성을 위해 결합 조건이 복잡할 경우, 별도 변수로 분리하거나 주석을 명시하는 것이 좋습니다.)
  # Recommended Practice
  # second와 third 작업이 모두 완료되어야 데이터 집계(aggregate) 시작
  pre_requisites = and_(second, third)

  @listen(pre_requisites)
  def aggregate_results(self):
      # 결과 처리
      pass
router
- Definition or When to use: 조건부 분기(Conditional Logic)가 필요할 때 사용합니다. 현재 상태(State)나 이전 작업 결과에 따라 다음 실행 경로를 동적으로 결정합니다.
How to use
- Explanation:
@router데코레이터를 사용하여 분기점 메서드를 정의합니다.-
반환된 값(주로 문자열)은
@listen으로 대기 중인 다른 메서드를 트리거합니다. -
Code block:
# Source Code from Lecture @router(final) def route(self): if self.state.is_admin: return "even" else: return "odd" -
Code block(Recommended Practice) (명확한 흐름 제어를 위해
match-case문(Python 3.10+)을 활용하면 가독성이 향상됩니다.)# Recommended Practice @router(final) def route(self): match self.state.is_admin: case True: return "even" case False: return "odd"
self.state
- Definition or When to use: Flow 내의 여러 단계(Step) 간에 데이터를 공유하고 유지하기 위해 사용합니다. Pydantic의
BaseModel을 활용하여 데이터 구조를 정의합니다.
How to use
- Explanation:
- Flow 클래스 정의 시 제네릭 타입으로 상태 모델을 주입합니다 (
Flow[MyFirstFlowState]). -
메서드 내부에서
self.state를 통해 읽기 및 쓰기가 가능합니다. -
Code block:
# Source Code from Lecture class MyFirstFlowState(BaseModel): user_id: int = 1 is_admin: bool = False # ... (내부 메서드에서 사용) ... def first(self): print(self.state.user_id) # 읽기 def second(self): self.state.user_id = 2 # 쓰기 -
Code block(Recommended Practice) (State 변경 시 유효성 검사 로직을 Pydantic 모델 내에 추가하여 데이터 무결성을 보장할 수 있습니다.)
  # Recommended Practice
  from pydantic import field_validator

  class MyFirstFlowState(BaseModel):
      user_id: int = 1

      @field_validator('user_id')
      def id_must_be_positive(cls, v):
          if v < 0:
              raise ValueError('must be positive')
          return v
recommendation (Design & Visualization)
- Definition or When to use: 복잡한 워크플로우 구현 전, 전체 구조를 시각화하여 검증할 때 사용합니다.
How to use
- Explanation:
- 구현 초기에는 실제 로직 없이 빈 메서드(pass)와 데코레이터만으로 뼈대를 잡습니다.
-
flow.plot()을 호출하여 HTML 파일로 흐름도를 생성, 구조를 눈으로 확인합니다. -
Code block:
# Source Code from Lecture flow = MyFirstFlow() flow.plot() -
Code block(Recommended Practice) (출력 파일명을 지정하여 버전별로 다이어그램을 관리하거나 특정 경로에 저장합니다.)
  # Recommended Practice
  # 워크플로우 구조를 시각화하여 'flow_structure.html'로 저장
  flow.plot(filename="flow_structure")
CrewAI 03-2 : Content Pipeline Agent
Refinement Loop (Loop-based Feedback)
- Definition or When to use: 품질 보증(QA) 루프를 구현할 때 사용합니다. 생성된 결과물이 특정 기준(Score)을 충족하지 못할 경우, 피드백을 반영하여 다시 생성 작업을 수행하도록 흐름을 제어합니다.
How to use
- Explanation:
router데코레이터를 사용하여 평가 점수(score)를 확인하고, 기준 미달 시 “재작업 신호(예: remake_blog)”를 문자열로 반환합니다.-
생성 메서드(예:
handle_make_blog)는listen(or_("start", "remake"))를 통해 초기 실행과 재작업 신호를 모두 수신하도록 설정합니다. -
Code block:
# Source Code from Lecture (main.py) @router(or_(check_seo, check_virality)) def score_router(self): content_type = self.state.content_type score = self.state.score if score.score >= 7: return "check_passed" else: if content_type == "blog": return "remake_blog" elif content_type == "linkedin": return "remake_linkedin_post" else: return "remake_tweet" @listen(or_("make_blog", "remake_blog")) def handle_make_blog(self): # ... 생성 로직 ... @listen("check_passed") def finalize_content(self): # ... 마무리 로직 ... -
Code block(Recommended Practice) (무한 루프 방지를 위해
retry_count제한을 상태(State)에 추가하는 것이 필수적입니다.)# Recommended Practice class ContentPipelineState(BaseModel): retry_count: int = 0 max_retries: int = 3 # ... existing fields ... @router(or_(check_seo, check_virality)) def score_router(self): if self.state.score.score >= 7 or self.state.retry_count >= self.state.max_retries: return "check_passed" self.state.retry_count += 1 # ... 리턴 로직 ...
LLM Class (Direct LLM Usage)
- Definition or When to use: 단순 데이터 변환, 포맷팅, 구조화된 데이터 생성이 필요할 때 사용합니다.
Agent와 달리 페르소나, 도구(Tool), 복잡한 추론 과정(Thought Loop) 없이 모델의 raw capability만 빠르게 활용할 때 적합합니다.
How to use
- Explanation:
crewai.LLM클래스를 인스턴스화하여 사용합니다.response_format인자에 Pydantic 모델을 전달하여 JSON 출력을 강제합니다.-
.call()메서드로 프롬프트를 전송합니다. -
Code block:
# Source Code from Lecture (main.py) from crewai import LLM llm = LLM(model="openai/o4-mini", response_format=BlogPost) result = llm.call( f""" Make a blog post with SEO practices on the topic {self.state.topic} using the following research: ... """ ) self.state.blog_post = BlogPost.model_validate_json(result) -
Code block(Recommended Practice) (모델 비용 최적화를 위해 단순 작업에는 가벼운 모델을 명시적으로 지정하여 사용합니다.)
  # Recommended Practice
  # 복잡한 추론이 필요 없는 포맷팅 작업에는 gpt-4o-mini 등 경량 모델 사용 권장
  llm = LLM(model="gpt-4o-mini", response_format=BlogPost)
Structured Prompting (Context Isolation)
- Definition or When to use: LLM에게 입력되는 데이터(Context)와 지시사항(Instruction)을 명확히 구분해야 할 때 사용합니다. XML 스타일 태그를 사용하여 모델이 데이터의 경계를 명확히 인식하게 합니다.
How to use
- Explanation:
- 프롬프트 내에
<tagname>과</tagname>을 사용하여 외부 데이터를 감쌉니다. -
특히, 입력 데이터(
self.state.research)에 줄바꿈이나 특수문자가 포함되어 있을 때 프롬프트 오작동을 방지합니다. -
Code block:
# Source Code from Lecture (main.py) result = llm.call( f""" Make a blog post ... using the following research: <research> ================ {self.state.research} ================ </research> """ ) -
Code block(Recommended Practice) (프롬프트가 길어질 경우
dedent를 사용하여 코드 가독성을 높이고 불필요한 공백을 제거합니다.)# Recommended Practice from textwrap import dedent prompt = dedent(f""" Analyze the following content clearly. <content> {self.state.research} </content> """)
kickoff_for_each : Sub-Crew Execution
- Definition or When to use: Flow 내에서 독립적인 에이전트 팀(Crew)을 서브루틴처럼 실행할 때 사용합니다.
kickoff(): 단일 입력에 대해 Crew를 1회 실행합니다. (본 강의 코드에서 사용됨)kickoff_for_each(): 입력 리스트(List)가 있을 때, 각 항목에 대해 병렬 혹은 순차적으로 Crew를 실행해야 할 때 사용합니다.
How to use
- Explanation:
@CrewBase로 정의된 클래스(예:SeoCrew)를 인스턴스화합니다..crew()메서드로 Crew 객체를 생성한 후.kickoff(inputs={...})를 호출합니다.-
결과값의
pydantic속성을 통해 구조화된 데이터를 받아옵니다. -
Code block:
# Source Code from Lecture (main.py) from seo_crew import SeoCrew result = ( SeoCrew() .crew() .kickoff( inputs={ "topic": self.state.topic, "blog_post": self.state.blog_post.model_dump_json(), } ) ) self.state.score = result.pydantic -
Code block(Recommended Practice) (만약 여러 개의 블로그 포스트를 동시에 검수해야 한다면
kickoff_for_each를 사용합니다.)# Recommended Practice inputs_list = [{"topic": topic, "blog_post": post} for post in posts] # 리스트의 각 항목에 대해 Crew 실행 results = SeoCrew().crew().kickoff_for_each(inputs=inputs_list)
Case Study : Handling Structured Output (Validation)
- Definition or When to use: LLM이 반환한 JSON 문자열을 Python 객체로 안전하게 변환할 때 사용합니다.
LLM클래스의response_format이 1차적으로 형식을 유도하지만, 최종적으로 객체화하는 단계입니다.
How to use
- Explanation:
- Pydantic 모델의
model_validate_json()메서드를 사용합니다. -
LLM이 반환한 raw string(
result)을 파싱하여 모델 인스턴스를 생성합니다. -
Code block:
# Source Code from Lecture (main.py) # LLM은 JSON 형태의 String을 반환함 result = llm.call(...) # String을 Pydantic 객체로 변환 self.state.blog_post = BlogPost.model_validate_json(result) -
Code block(Recommended Practice) (JSON 파싱 에러에 대비한 예외 처리를 추가하여 안정성을 높입니다.)
  # Recommended Practice
  try:
      self.state.blog_post = BlogPost.model_validate_json(result)
  except ValueError as e:
      print(f"JSON validation failed: {e}")
      # 실패 시 재시도 로직 혹은 기본값 설정
      self.state.blog_post = BlogPost(title="Error", subtitle="Retry needed", sections=[])